DIY Pool Toy Storage – Looking for an easy solution to clearing up all those toys around the pool?
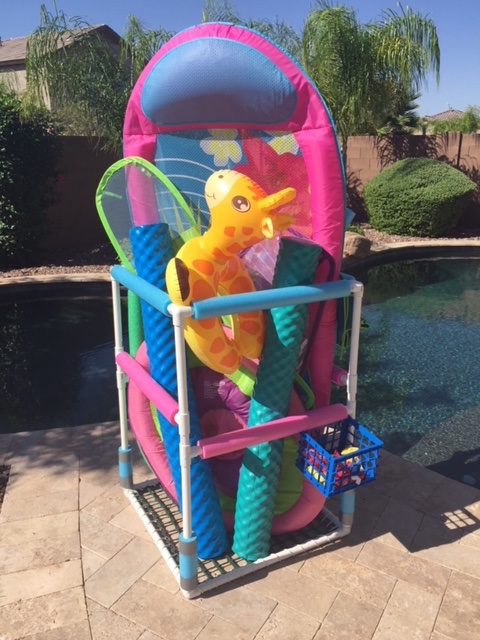
Here’s an inexpensive project that will provide plenty of storage and still fit nicely on your porch or patio.
It’s also light weight and can easily be moved next to the water when needed, or back to an out of the way location.
Final Dimensions: 39″ Height x 27″ Width (You can tweak this to make it any size you want – just adjust your cut list sizes below).
(NOTE: If you’d rather not try to make your own, Amazon sells the following pool toy storage bins online):
Supply List
36′ of Schedule 40 PVCPVC Cement and Purple Primer
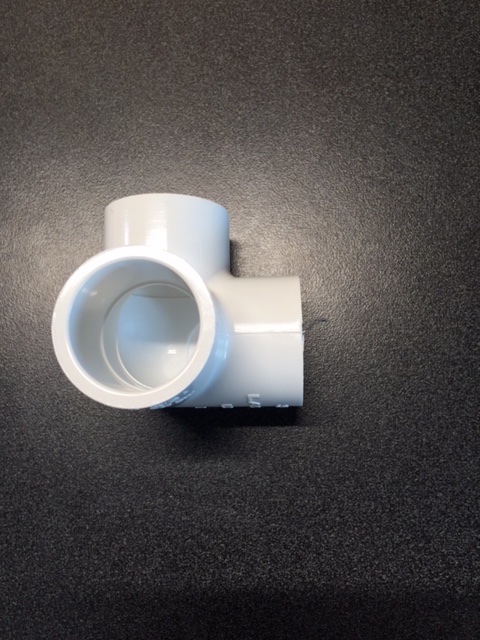
(8) 3/4 Schedule 40 PVC Side Out Connectors
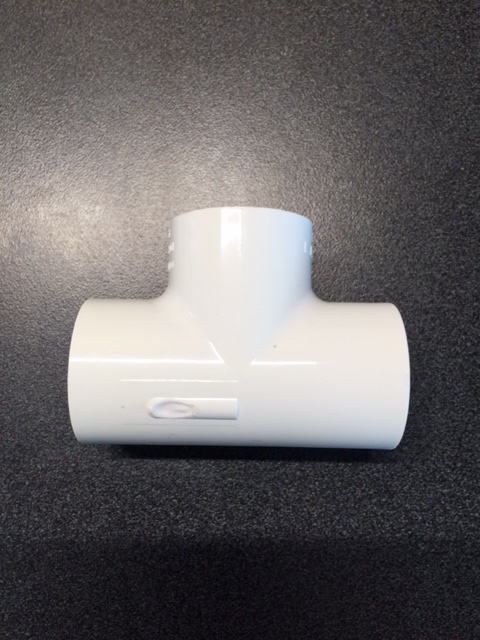
(8) 3/4″ Schedule 40 PVC Tee Connectors
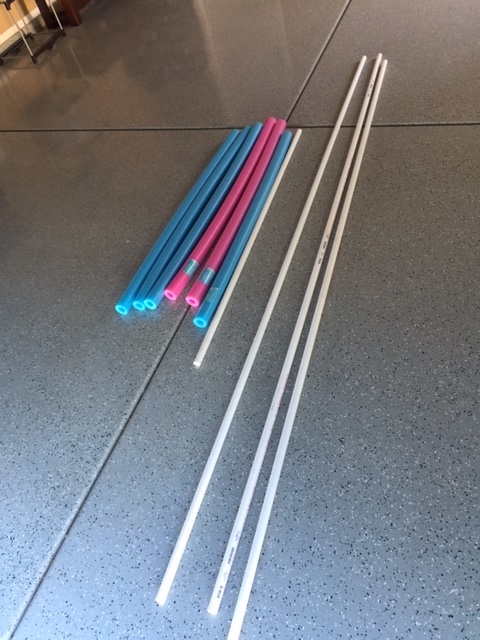
(4) Foam Pool Noodles
Mesh or Plastic Webbing for Bottom
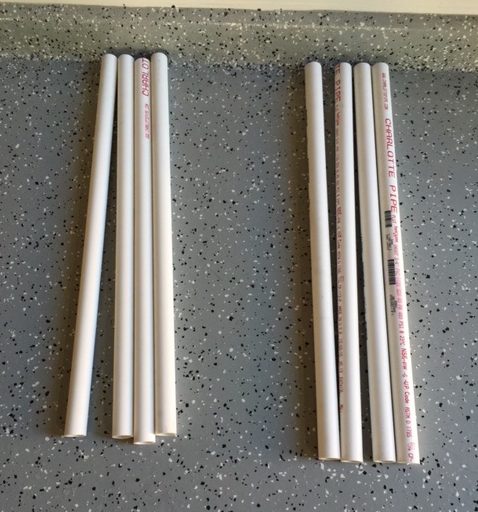
PVC Cut List
(12) @ 24″ (Bottom, Center, Top Supports)
(4) @ 18″ (Bottom Legs)
(4) @ 4″ (Middle Legs)
(4) @ 12″ (Top Legs)
Remember, you can tweak these lengths if you want to adjust the dimensions of your storage bin.
To cut the PVC, I used a regular hand saw.
After cutting your PVC pieces to length, assemble as follows:
IMPORTANT: Assemble on a flat surface and make sure you square your project as you go. The cement bonds very quickly so you won’t have a lot of time to make adjustments. Another option is to not use any cement at all, however, the final project could come apart if the pieces are pulled on.
Step 1: Attach (4) of the 24″ PVC pieces to (4) side outlet connectors to create your square bottom piece. Use the PVC cement to glue the pieces together.
Step 2: Add the (4) 18″ Bottom Legs
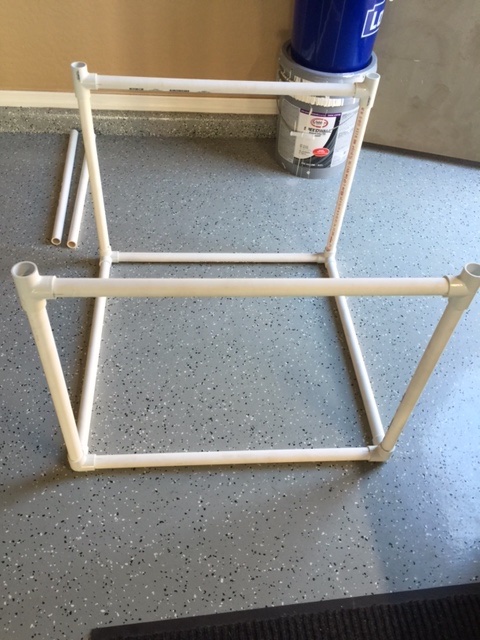
Step 3: Top the Bottom Legs with (4) Tee Connectors, each pair of connectors should be facing each other so when the Mid Supports are added they will be parallel to each other.
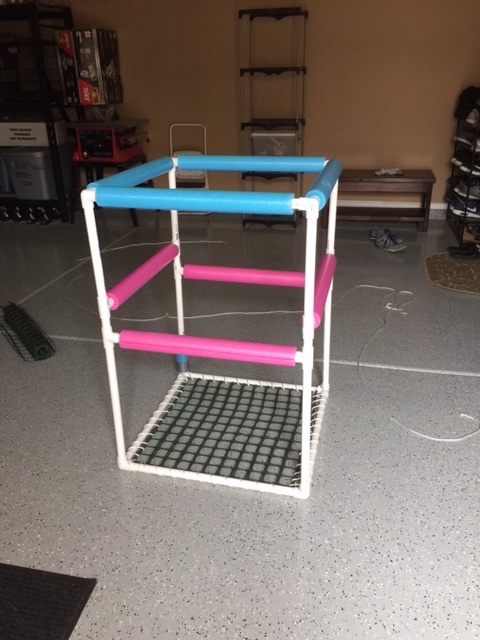
Step 4: Add (2) Mid Supports (Project should look like the picture).
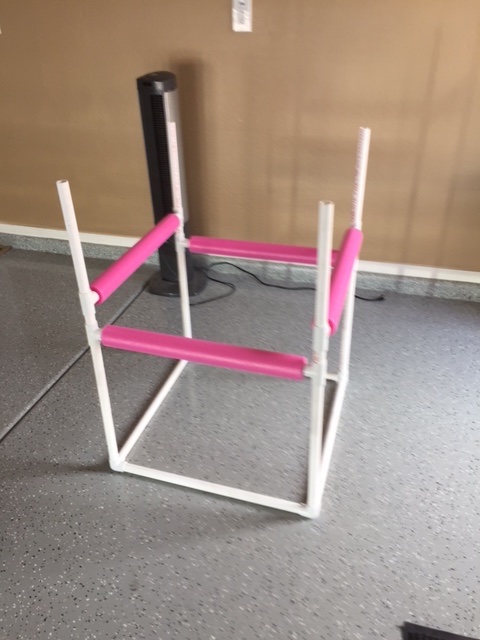
Step 5: Add (4) 4″ Leg pieces and top with last (4) Tee Connectors. The Tee Connectors should be facing each other perpendicular to the previous (4) as shown in the picture.
Step 6: Add final (2) Mid Supports.
Step 7: Add the (4) 12″ Top Legs
Optional: You can start adding your foam pieces to the Mid Supports at this point by either sliding them on before attaching them, or by cutting them lengthwise and slipping over the already assembled pieces.
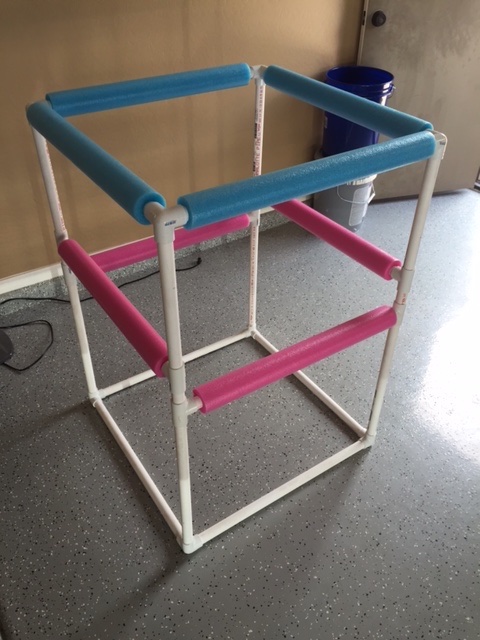
Step 8: Make the top piece just like you made the bottom. Use the final (4) 24″ pieces and (4) Side Outlet Connectors to create the square Top.
Step 9: Attach the Top Piece to the assembled Project.
Step 10: Cut Foam Noodles to length and attach to the Mid and Top Supports. If you use the same measurements as I did, the length of each foam piece will be 22″.
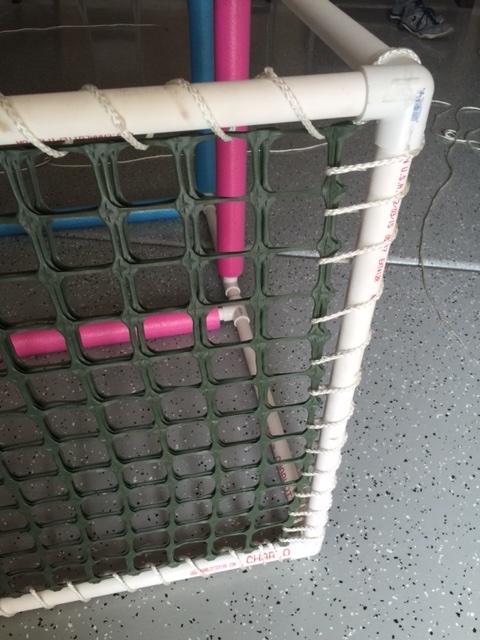
Final Step: The last step to complete the DIY Pool Toy Storage project is to add a bottom. There are several options available, including using mesh or plastic fence material. The idea is to use something that is breathable, will drain water from wet toys adequately, and will stand up to the elements if the project is stored outside.
I was originally going to use mesh but could not find any at the big box home improvement stores. I ended up using plastic fencing material and attaching it with coated rope. I tripled the fence layers for added strength.
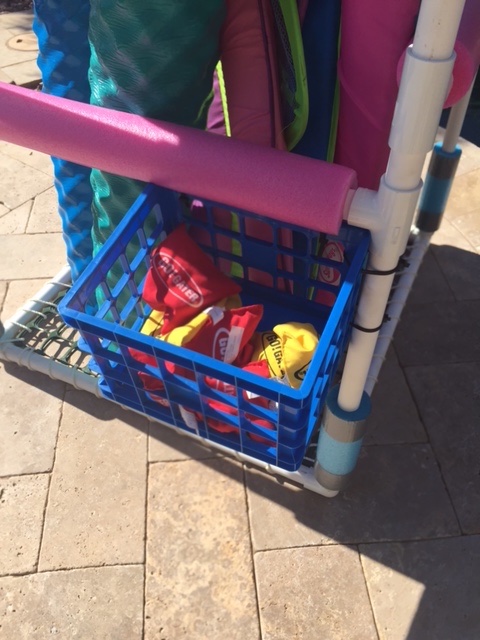
Optional: You can add plastic bins to the finished unit with zip ties for additional storage.