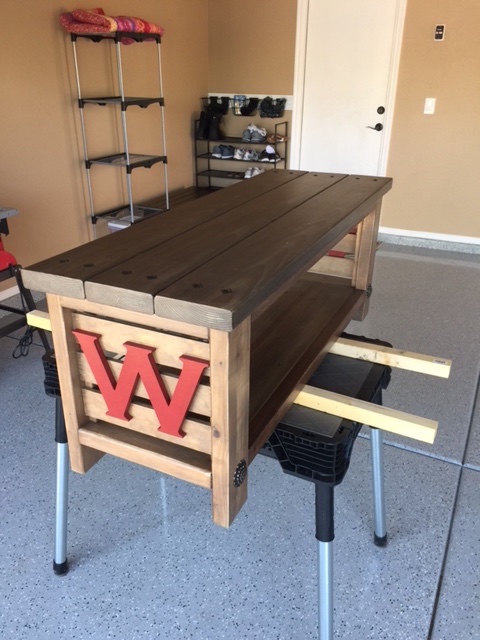
DIY Custom Bench – I didn’t plan on starting another seating project for awhile, and certainly not immediately after completing the DIY Entryway Bench, but these were the marching orders from the wife. She wanted a slightly longer bench that could be put in the garage next to our shoe rack, big enough for two people to sit on at one time.
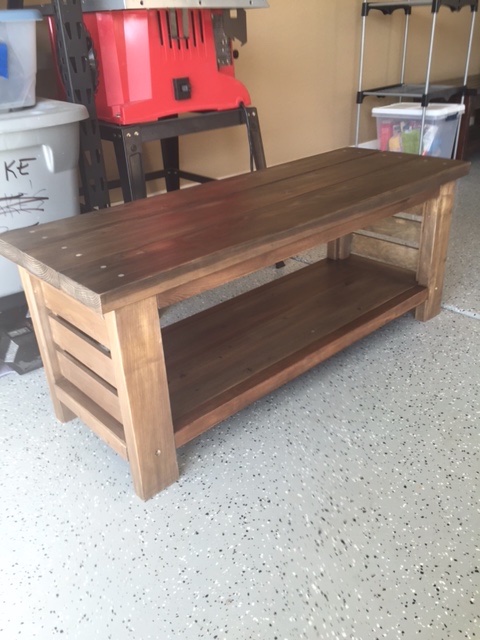
Custom Bench Dimensions: 45″ L x 16 1/8″ W x 18″ H
(NOTE: The width came out to 16 1/8″ rather than 16 1/2″ because many lumber pieces at Lowe’s are not traditional lumber sizes, e.g. a typical 2″ x 6″ is usually 1 1/2″ x 5 1/2″. The pieces I obtained from Lowe’s were 1 1/2″ x 5 3/8″).
Tool List
- Table Saw
- Miter Saw
- Pneumatic Nail Gun
- Air Compressor
- Hammer
- Drill
- Kreg Jig Pocket Hole System
- Kreg Pocket Hole Screws – 2 1/2″
- Kreg Pocket Hole Screws – 1 1/4″
- Sandpaper
- Wood Stain – You can use any color you want. For my project, I made my own Iron Acetate with White Vinegar and Steel Wool – Instructions here. This gives the wood an aged and weathered look. I also prepared the wood for the Acetate by brushing it with strong Black Tea.
- Polyurethane or Polycrylic Finish
- Wood Glue
- Wood Filler
- Wood Decorations/Metal Enhancements
(TIP: I get most of my tools and DIY supplies from Amazon, their prices are always competitive and I get exactly what I want very quickly – check out this link for current Great Home Improvement Deals).
Lumber and Cut List
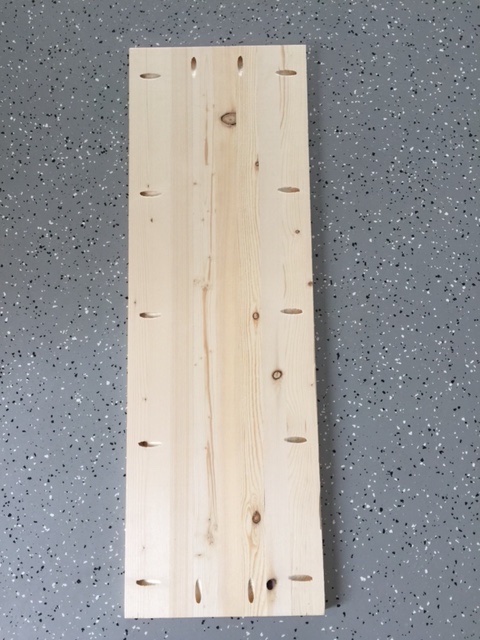
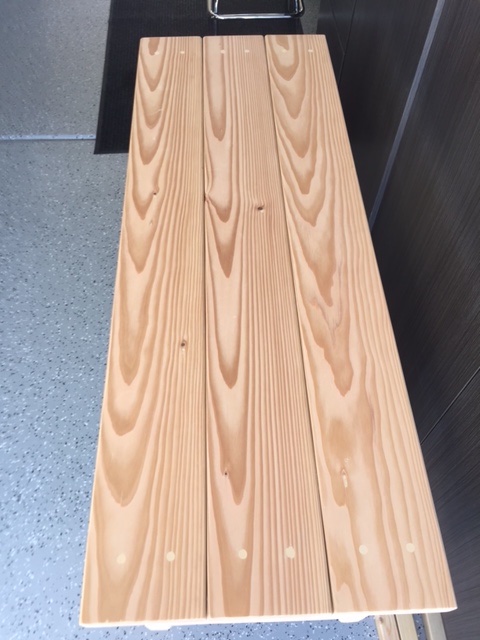
(3) 2 x 6 @ 45″ – Top Pieces
(4) 2 x 4 @ 16 1/2″ – Legs
(4) 2 x 4 @ 11 3/4″ – Sides
(4) 2 x 2 @ 36″ – Edges
(4) 1 x 2 @ 10 1/2″ – Side Slat Support Pieces
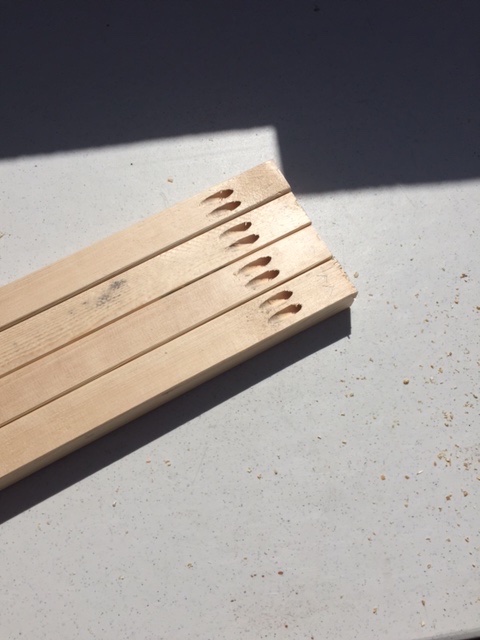
(6) 3/8″ x 2 1/2″ @ 11 3/4″ – Side Slats
(1) 12″ W x 36″ L Project Panel – Bottom Shelf (Actual Size is 11 7/8″ Wide).
Instructions
Cut the project pieces to length according to the list above.
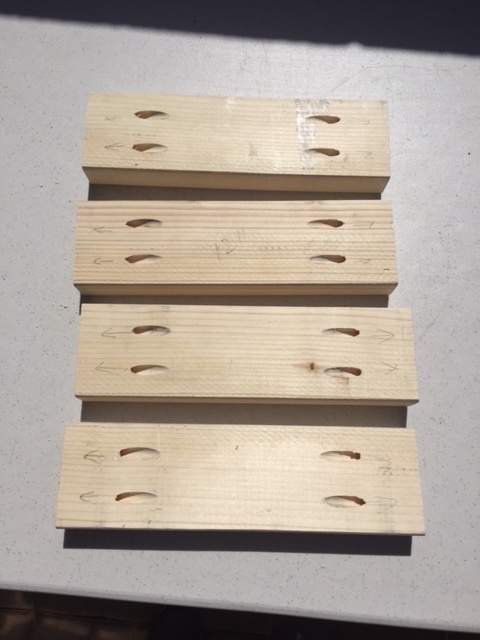
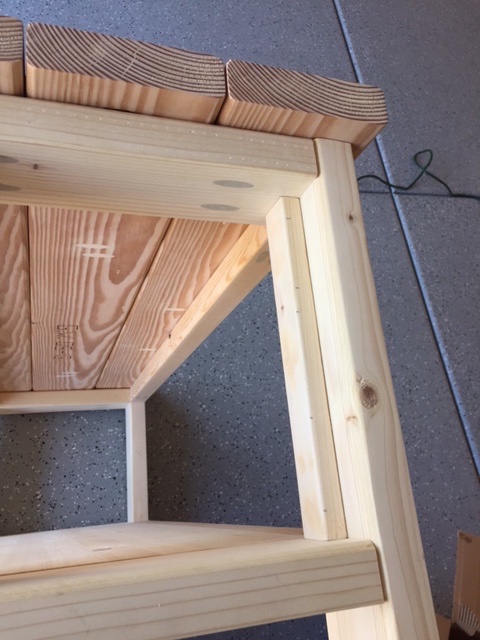
Use the Kreg Jig Pocket Hole System to pre-drill screw holes on the (4) 2 x 4 Side pieces, the (4) 2 x 2 Edge pieces, and the project panel as shown below.
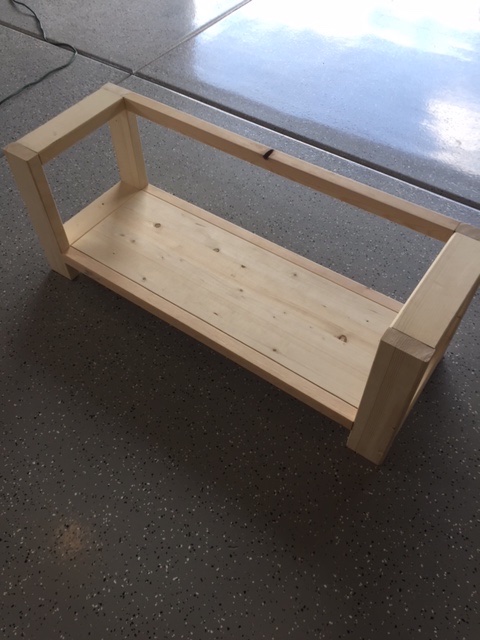
Build the front and rear part of the bench by attaching two of the 36″ 2 x 2 Edges to the four 2 x 4 Legs.
The Edges should be attached 3″ from the bottom of the Legs with Kreg Pocket Hole Screws – 2 1/2″
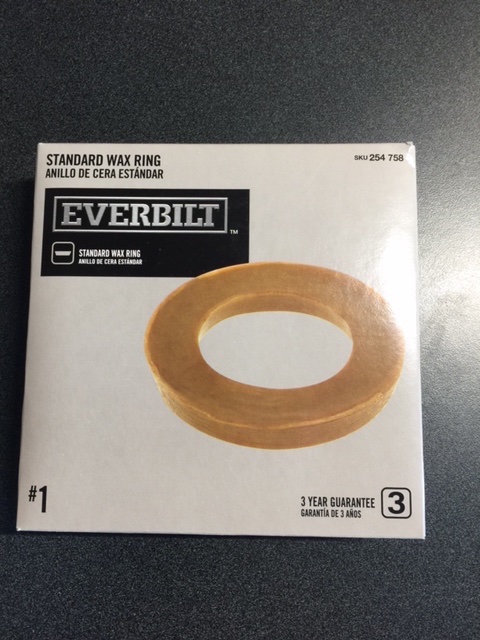
TIP: Try coating the screws with wax to help prevent the wood from cracking. You can buy actual screw wax, but if you want a less expensive alternative try using a toilet bowl wax ring like the one below. Works great.
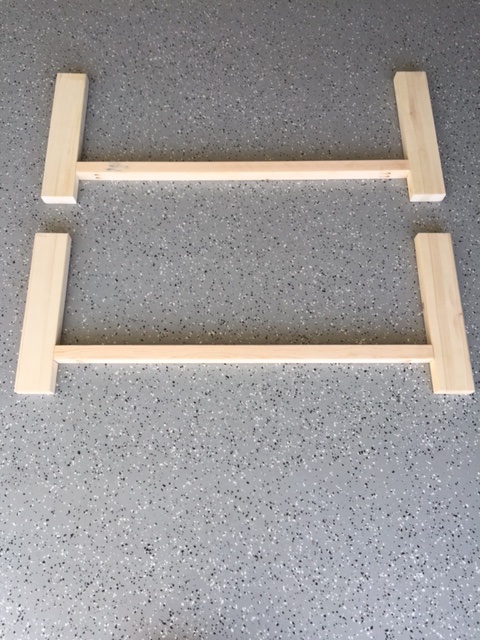
Connect the front and rear part of the bench together with the four 11 3/4″ 2 x 4 Sides.
The bottom Side pieces should be attached 3″ from the bottom of the Legs.
Attach the bottom Project Panel with Kreg Pocket Hole Screws – 1 1/4″ and finish with the top two 36″ 2 x 2 Edges.
Make sure all of your corners are square as you complete the project.
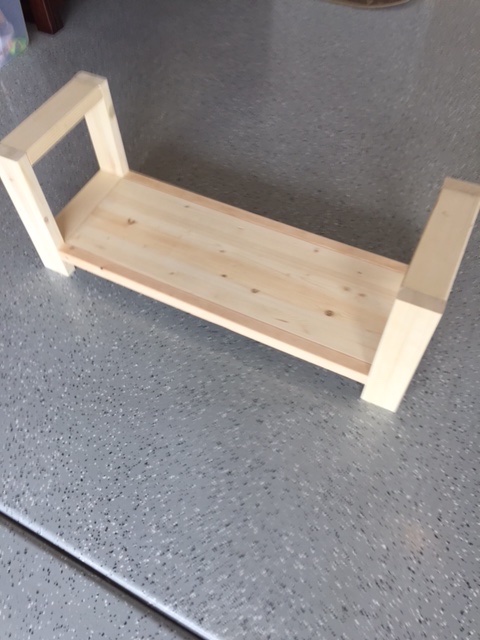
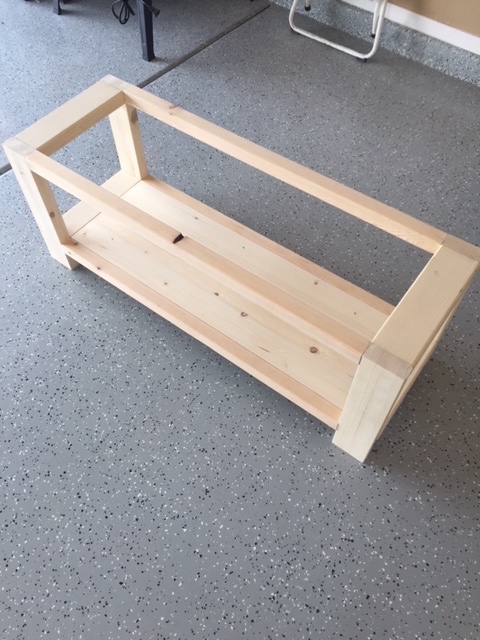
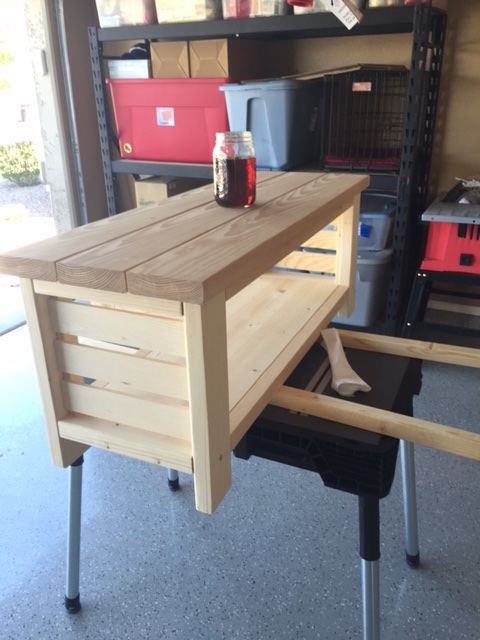
Assemble and attach the top of the bench.
For this project, you can attach the three 45″ 2 x 6 pieces together using the Kreg Jig Pocket Hole System and Kreg Pocket Hole Screws – 2 1/2″ , or you can simply screw the pieces down individually onto the bottom piece of the bench.
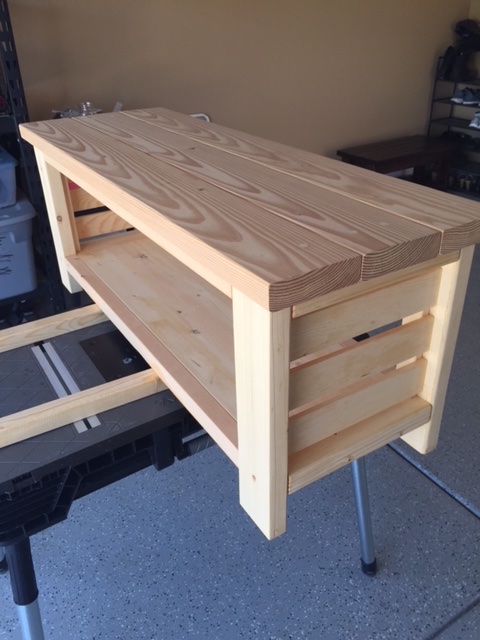
Fill all of the screw holes with wood filler and sand thoroughly.
NOTE: I used a plastic wood filler which was a big mistake for this project. My self made Iron Acetate stain did not color the filler and I ultimately used a different method to hide the screw holes (See addition of Decorative Metal Caps below).


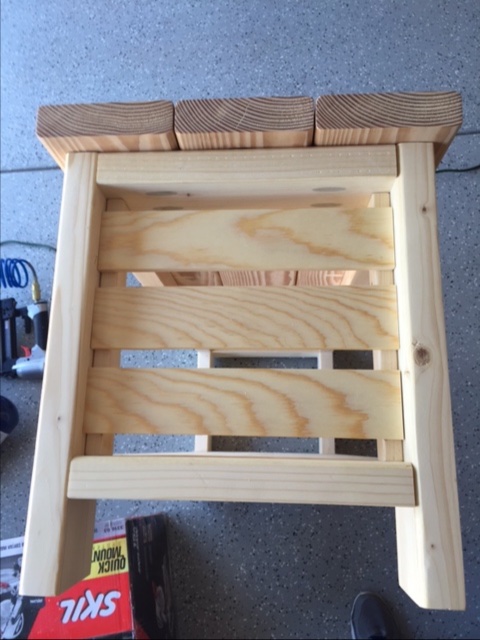
Attach two of the Side Slat Support Pieces to each side of the bench.
Set the pieces back from the outer edge 1 1/4″ and affix with 1 1/2″ Brad Nails and Glue.
Next, attach the slats with uniform gaps using 1″ Brad Nails.
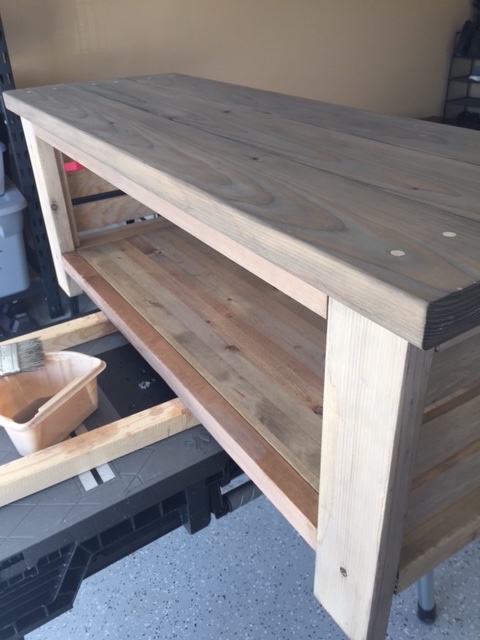
Place the assembled bench in a well ventilated area and apply a coat of strong Black Tea using a regular foam or bristle paint brush.
After the Black Tea dries, apply the first coat of Iron Acetate using a foam or bristle brush. Apply additional coats for a darker appearance if desired.
Once you achieve the desired look, let the bench thoroughly dry. The vinegar smell from the Iron Acetate is very strong but it will go away.
At this time, you can choose to distress the stained wood with sand paper to make it appear even more aged.
Finish up by applying the Polycrylic or Urethane finish. I used a Clear Matte finish for this project.
Add some enhancements to the bench to give it a unique flair or leave it as is.
I attached two wooden letters to the end slats that I obtained from a local craft shop.
I painted them with a base dark gray paint, and then followed that with several coats of a deep red.
I attached the letter to the slats with 3/4″ Brad Nails and glue.