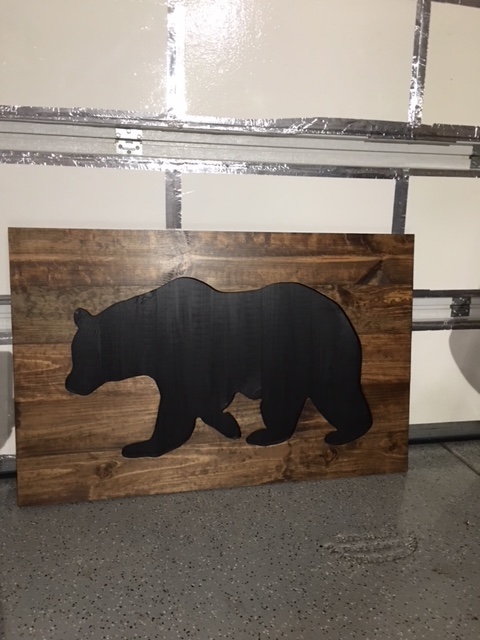
DIY Bear Wall Hanging – I made this unique bear wall hanging to hang over our
fireplace at our small cabin in the woods.
It matches our rustic interior theme and really stands out as a focal point in the family room. While I chose a bear for my project, you can use any silhouette design you want and create a beautiful wall hanging.
Materials Required:
- Wood – You can pretty much use any wood you want to complete this project. If you are going to hang the finished project on the wall then you should try to get boards that are thin enough that the overall weight remains manageable. I chose tongue and groove Blue Pine Shiplap Siding that I purchased at Home Depot. Each panel was a little over 7 inches wide and just under 3/4″ thick. I liked the knotty, weathered look of the wood and after it was stained it had the rustic appearance I wanted for our cabin. My DIY Bear Wall hanging measured 50 1/2 inches wide by 32 1/2 inches tall when it was completed, but you can create whatever size you want using the instructions below.
- 1″ x 3″ Wood Boards – Enough to go around the inside edge of your project’s back side for support.
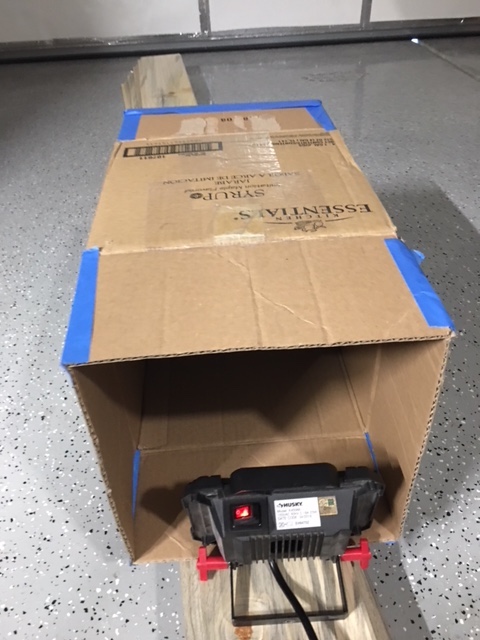
- Small Cardboard Box for homemade overhead projector.
- Flashlight or small work light.
- Pencil
- Tape
- Jigsaw – I use a Ryobi Cordless 18V Orbital Jig Saw
- Wood Screws
- Wood Glue
- Tape Measure
- Wood Saw (Hand, Table, or Mitre) – A good choice is the Metabo HPT 10″ Compound Miter Saw
- Wood Stain or Paint – I used Minwax Early American Wood Stain for the surrounding frame and Minwax Ebony Wood Stain
- Wood Finish – I used Minwax Polycrylic Protective Clear Matte Finish
- Wall Hanging Hardware – I used Heavy Duty D Rings and 100 lb hanging wire for my project.
Instructions:
Step 1 – Determine what size your finished project will be and buy your wood material accordingly.
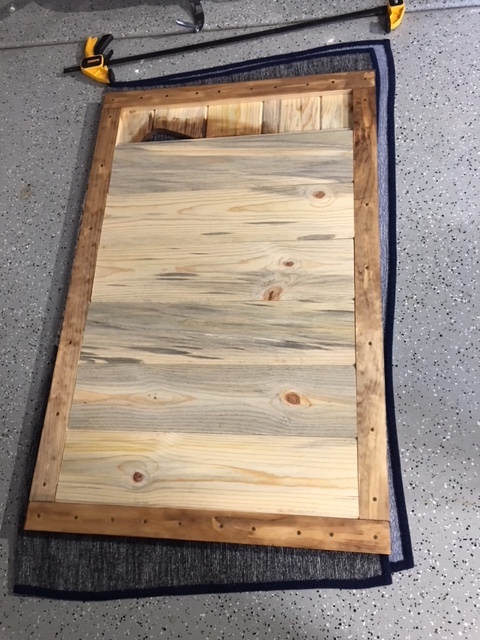
Using a hand/table/mitre saw, cut your wood panels to create the overall length and width of your finished project. For example, I used seven 50 1/2″ lengths of Blue Pine Shiplap Siding for my project.
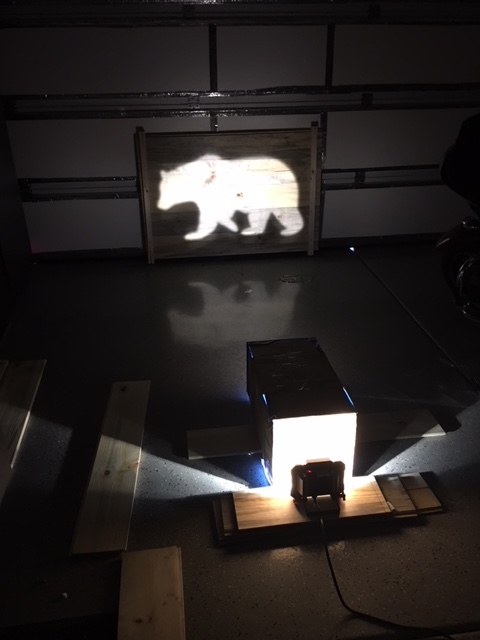
Put your panels together temporarily as I did in the picture, or using your 1″ x 3″ boards to secure them permanently at this time. Place the assembled panels against an open wall in a room that you can make very dark. I used my garage.
Step 2 – Find a design or a silhouette that you want to use for your unique wall hanging. For my project I located the bear design at http://weclipart.com.
Print the design on paper and cut out the silhouette.
Use a cardboard box, or some other enclosed object to create a DIY overhead projector (see pictures below).
Tape your cutout design to one end of the cardboard box, turn out all lights and use the flashlight or work light to backlight the silhouette. Put the image over your wood panels and carefully trace the outline pattern with a pencil.

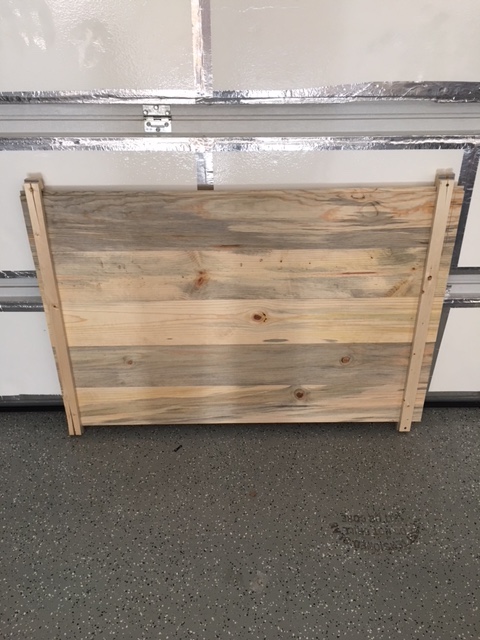
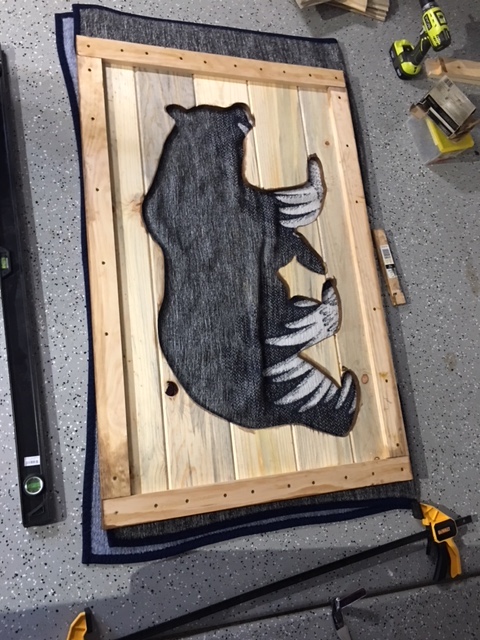
Step 3 – Assemble your wood panels by using the 1″ x 3″ boards (or smaller if your project is not as big as mine) to create a frame on the back (see picture). Use wood screws and glue to attach the boards.
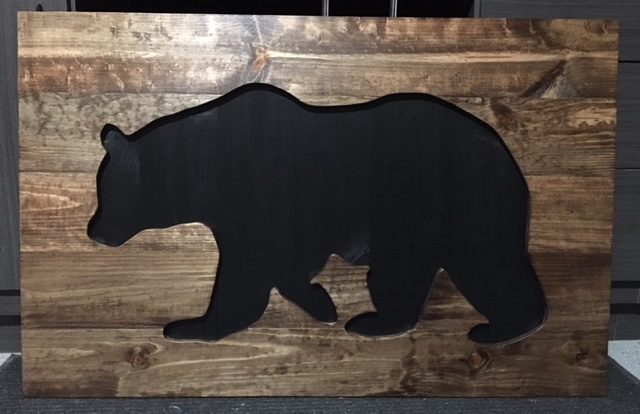
Using the jigsaw, carefully cut out your design by following along the pattern you outlined in pencil.
Sand any rough edges using 220 grit or finer sandpaper.
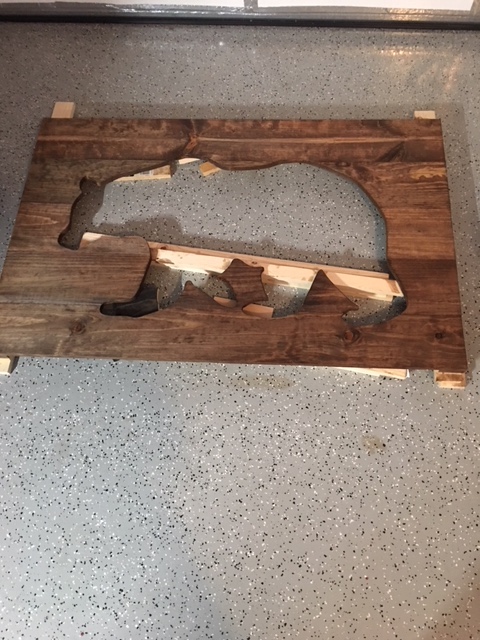
Stain and apply finish to the cutout portion (framed outline) of your project at this time.
Measure and cut the boards to be used for the bear (your design) silhouette backing.
Step 4 – Stain the silhouette backing boards black (or whatever color you wish). Apply your finish coats and let dry.
Attach the stained and finished boards to the rear of the frame using screws (or a nail gun) and glue.
Add your hanging hardware.